Angel Wing Begonia Tutorial
Angel Wing Begonia Tutorial
by Quynh Nguyen of The Posey Box
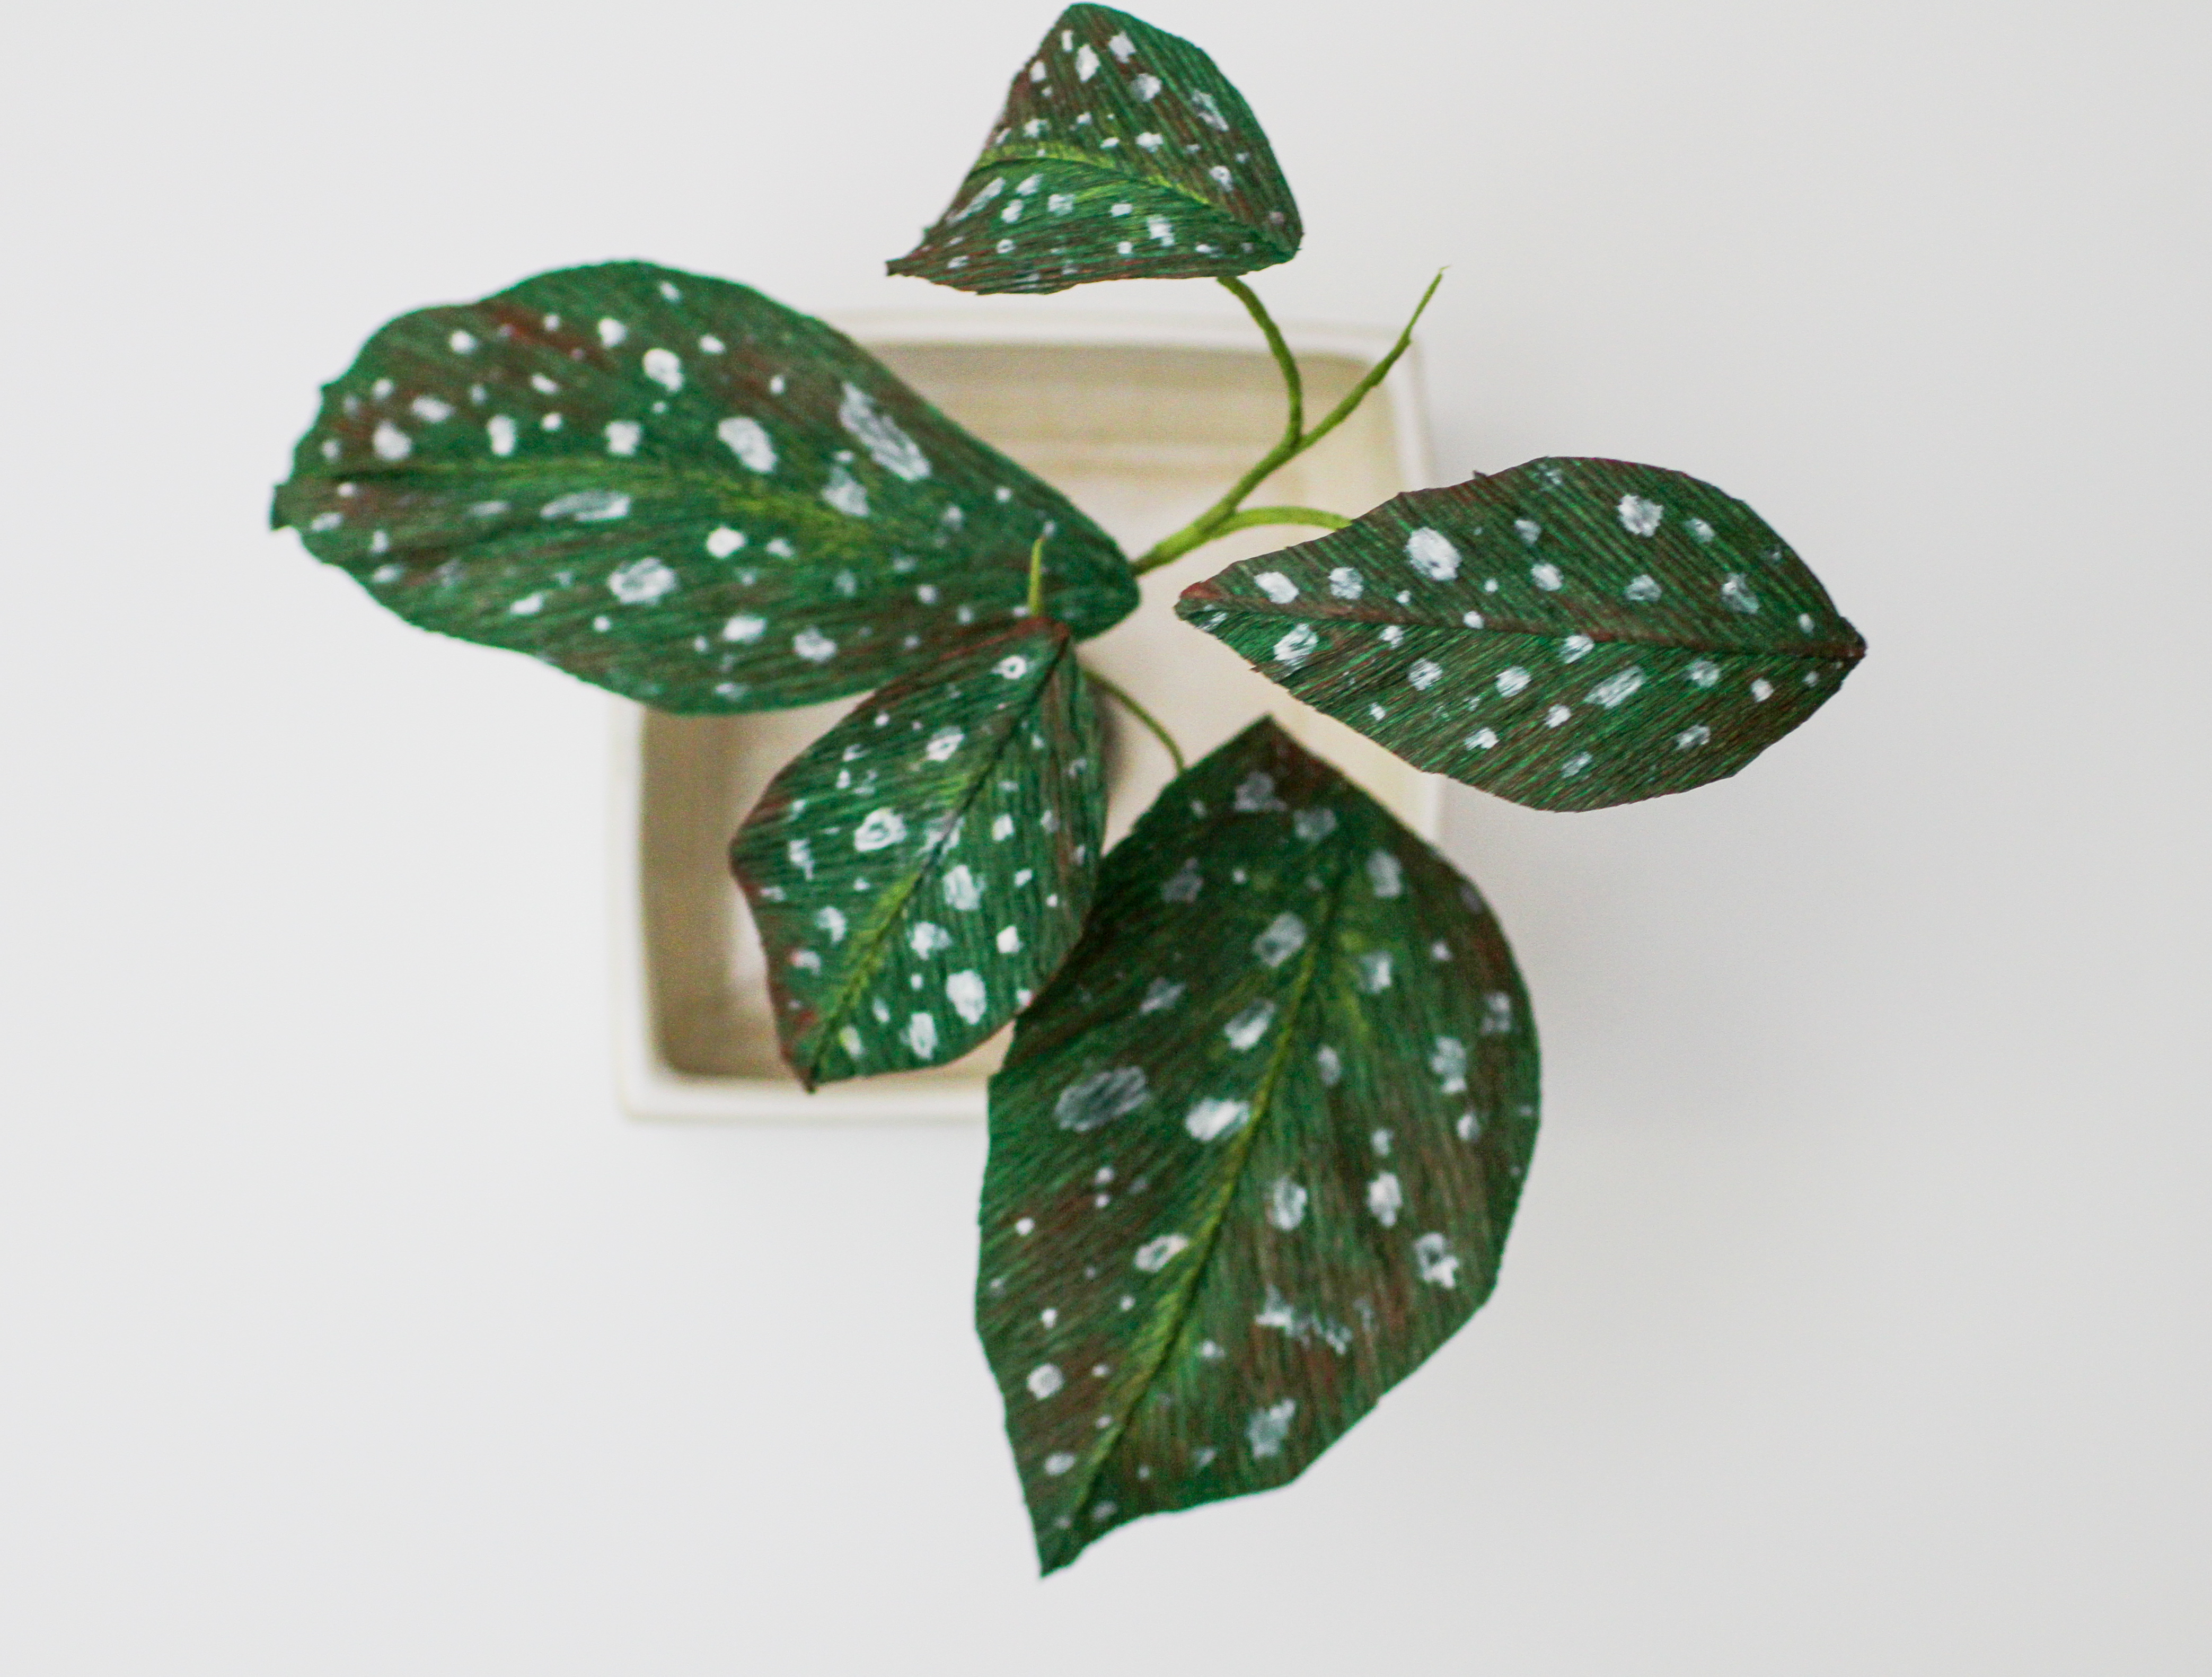
There’s something adorable about the spotted leaves of an Angel Wing Begonia, which I set out to capture in my latest tutorial.
You can adapt these techniques to make your plant as unique as you are. Give the leaves a more jagged edge, or create a redder variety. The possibilities are endless!
But first, let’s talk about glue and paint.
I used Aleene’s Clear Tacky Glue for this tutorial, and I highly recommend it. It is so much tackier and dries super fast. I also love that it doesn’t yellow over time, which is key for long-living flowers like ours. Remember to close the cap between uses—it’s easy to forget when you’re in the middle of a project!
The Tulip Dimensional Paint for the dots is so easy to use, and it comes in a variety of colors that you can experiment and play with. Consider mixing the colors together to get a darker or lighter color. This paint would be fun to use for mushrooms that have bumps on their caps like the Amanita muscaria (the well-known toadstool with a red cap and white spots).

For more tips on using Aleene’s Tacky Glue, check out my previous post here.
Now let’s get started!
Supplies:
- Heavy crepe paper, 180 or 140 gram
- Scissors
- Aleene’s Clear Tacky Glue
- Tulip Dimensional Paint
- 24 gauge floral wire
- Light green floral tape
- PanPastel, 340.1 Permanent Red Extra Dark
- Makeup sponge
Instructions:
Step 1: Cut the crepe
- Cut a 2.5” x 5” strip from the crepe. The wrinkly lines, or the grain, should run across the shorter length, like a party streamer.
- Fold the strip into thirds widthwise.
- Cut the folds to make three rectangles.
Step 2: Cut a leaf
- Cut a rectangle from corner to corner, diagonally.
- Flip the left triangle over and line up the long cut sides to make a kite shape. The grain should run slightly down and away from the center line on both sides.
- Run a line of clear tacky glue up the centerline of one of the triangle pieces. Fold over the other triangle (the shapes should match perfectly). Press the glue firmly to secure the pieces together.
- Open the kite shape and crease it back open, the glued strip at the back folded to one side.
- Trim the outside of the kite shape to make it leaf shaped by rounding off the edges and cleaning up the pointed tip.
Step 3: Add the wire
- Fold a 24 gauge wire in half.
- About an inch up from the fold, bend one wire out at a 90° angle.
- On the underside of the leaf, run a line of clear tacky glue under one side of the flap.
- Press the wire into the line of glue, with the folded end of the wire at the base of the leaf. If the straight half of the wire extends beyond the tip of the leaf, trim the wire. The wire should sit snug against the middle line of the leaf.
- Smooth the flap of paper down, flat against the leaf, to securely hold the wire in place.
- The 90° wire should be poking out of the flap. Bend it around the flap to make it perpendicular to the leaf. This is the stem.
Step 4: Color the leaf
- Use the makeup sponge to gently apply PanPastel to both sides of the leaf, particularly the outer edges.
- You can add some highlights with a lighter green color to the top of the leaf, as well. This looks good on the midline and as an asterisk-shape on top of the stem.
- Add dots of Tulip Dimensional Paint across the surface of the leaf (look at photos of real Angel Wing Begonias for inspiration). Most have varying small and big dots. You can place the big dots with the tube of paint, and then use a smaller tool like a wire to place the smaller dots.
- Allow to dry completely. The bigger the dot, the longer to dry.
Step 5: Make additional leaves
- Repeat to make as many leaves as desired.
Step 6: Assemble plant
- Wrap the stems with the light green floral tape, joining the stems together at intervals to create the entire plant. Wrap with more tape closer to where the roots would be to make the stem thicker.

I’d love to see what you create or answer any questions you have! Feel free to tag or DM me on Instagram @theposeybox.

50% Complete
Two Step
Lorem ipsum dolor sit amet, consectetur adipiscing elit, sed do eiusmod tempor incididunt ut labore et dolore magna aliqua.