A Cherry Blossom Tutorial to Celebrate Spring
Nothing heralds the beginning of spring quite like clouds of pink cherry blossoms arching overhead. I love to stand under cherry trees and watch the little petals flutter to the ground like a cascade of candy-colored rain.
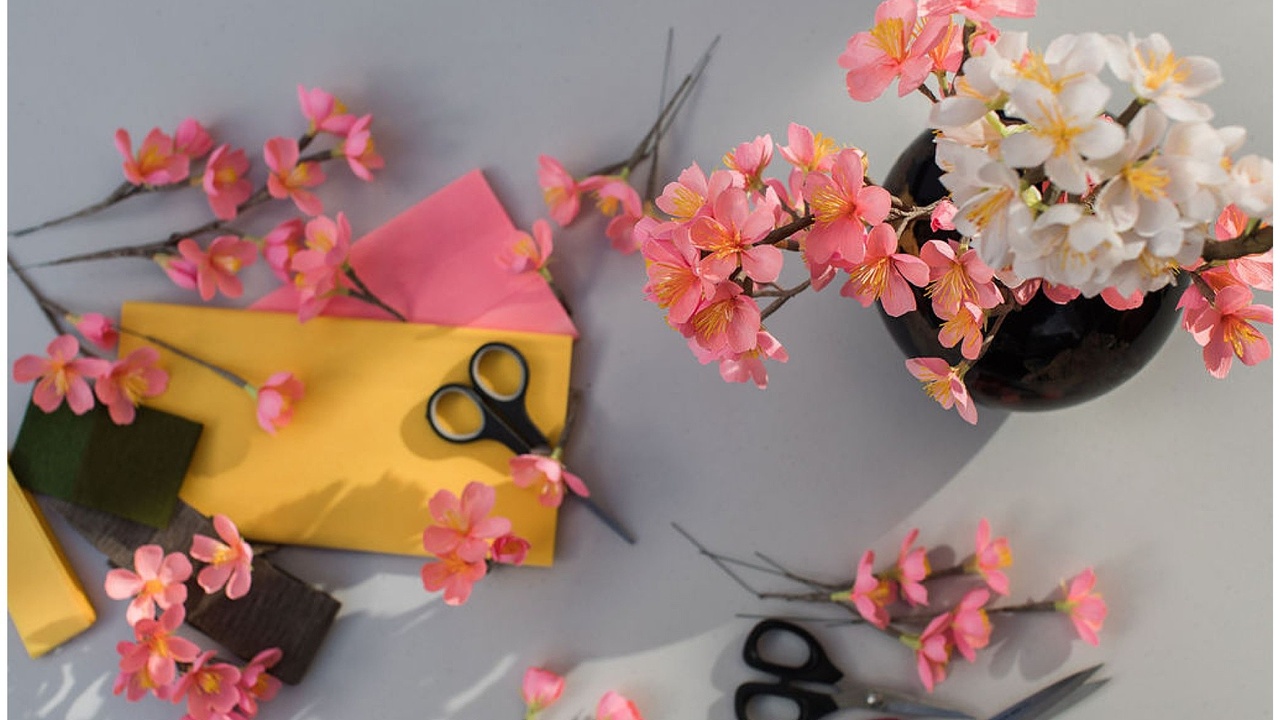
To celebrate these delicate and short-lived blossoms, I’ve put together a cherry blossom paper flower tutorial that will bring a piece of spring into your home. These cheerful, tiny blooms are exactly what my home needs after a long, chilly winter. I can’t wait to share it with you!

I’ve been passionate about paper cherry blossoms for a long time. A few years ago I even created six cherry blossom installations for stores around Seattle—which you can read more about here. Even after cutting thousands of those little petals, I’m still in love with these beauties.

That’s why I’ve worked hard to bring you an easy to use cherry blossom tutorial that will guide you every step of the way. I want to share the love!
Techniques You’ll Learn
With my cherry blossom tutorial, you’ll learn new techniques that will strengthen your paper flower skills and broaden your repertoire.
Here’s what you will learn to do:
- Cut cherry blossom petals and their buds.
- Put together the petals, stamens, and bracts to form a cluster of blossoms.
- Make a texturized knobby branch.
- Blend in blossom stems to small branches, and small branches to larger branches.
- Join small branches and stems to create a larger branch.
- Various ways to color petals and branches to add depth and dimension.
- Use alcohol markers, NuPastels, and water-resistant ink markers to color petals and stamens.

You can easily use the supplies you have on hand to color your creation—there are so many ways to do it, and with paper flowers, you can be as creative as you want!
You can also make more translucent petals by using Italian 90 gsm. I’ll be demonstrating with German doublette, extra-fine, and Chinese crepe paper, but substituting with the Italian will create a more delicate blossom. Just make sure to stretch the 90 gsm by 60% before cutting your petals. You can easily replace the brown Chinese crepe paper with Dennison or even Italian 140 gsm or 180 gsm.
Simplify with a Supply Kit
To make things even simpler, I’m releasing a limited number of kits that will provide all of the basic materials you’ll need to make your blossoms. Once those 30 kits are gone, they’re gone. They cost $20 and include free shipping (only available in the U.S.).
Supply kits include:
- German doublette in pink and yellow
- Extra fine crepe in light green
- Chinese crepe in brown
- Wires: 22 gauge and 26 gauge
- Tacky glue
- Spun cotton 10 mm
- Printed copy of the template on 32 weight paper

Recommended Tools
Having the right tools really does make a difference. Needless to say, Amazon has made my life easier with same day or two day delivery. Here are some of my favorite tools delivered via Amazon.
Affiliate disclosure: If you buy products through these links, I will receive a small commission. Know that I always love and use these affiliate products myself and that the money will go toward bringing you more valuable content.
Pastel brushes: When applying any pastels, especially PanPastels or NuPastels, I like to use these brushes. Amazon has them for a great price.
Quick tip: To clean your brush between colors, use an old cotton towel and rub the color away before applying a different color. I noticed that if I don't wash the brush, they tend to last much longer. Another option is to dedicate certain brushes for certain colors.
Scissors: You’ve probably heard me praise my favorite Kai scissors before. I love the 6 ½” size for being really diversified and easy to hold and use these.
Wires: When you have to cut lots of wires, Clauss wins hands down as my most used tool for this project.
Tacky glue: One of my favorite glues is Aleene’s Tacky Glue. I love that they came out with this glue pen that you can easily refill when it’s all used up. Here are these!

I’m so excited to finally share my cherry blossom tutorial with you. Don’t hesitate to reach out with any questions you may have. Let’s celebrate spring’s arrival together!


50% Complete
Two Step
Lorem ipsum dolor sit amet, consectetur adipiscing elit, sed do eiusmod tempor incididunt ut labore et dolore magna aliqua.